how to draw a 3d shapes step by step
Drawing three-D Shapes: 5 Tutorials and Skillful Tips & Tricks
If you lot want to learn to draw realistically, iii-D shapes are a foundation for doing then. Once y'all know how to imply multi-dimensional form, you can apply your cognition to all types of subjects.
Acquire how to draw 3-D shapes and make your art pop off the page.
You don't demand any special tools to larn this skill. I'm using a pencil and paper, but experience costless to utilise pens, colored pencils, crayons — whatever strikes your fancy.
Here are drawing tutorials for five common 3-D shapes with some helpful tips and tricks for cartoon them. Each is broken down into simple steps that helps build the overall form.
1. How to draw 3-D triangles
In that location are two types of multi-dimensional triangles: prisms (left) and pyramids (correct).
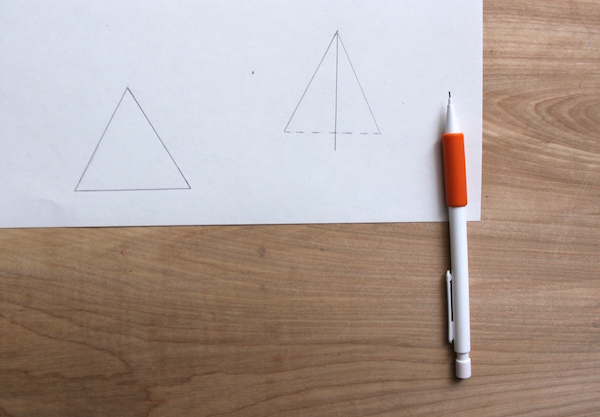
Stride 1:
When drawing a prism, start with a simple, flat triangle and modest horizon point that's at the side of the shape. It doesn't matter which side yous chose. Where you place the horizon point determines the length and bending of your prism.
To create a pyramid, depict three lines, as shown on the right higher up. In the center should exist a direct line. From the top of the straight line, describe two angled lines that are the same length. It'southward OK if the angles aren't exactly identical.

Pace 2:
Requite your prism a 3-D appearance by drawing 2 lines: ane off the height corner and one off the base of operations corner of the triangle that's closer to the horizon point. Depict the lines lightly all the way to the horizon indicate. And so, shut it off with a single line that's the aforementioned bending equally the nearest side of the triangle. Erase the lines extending to the horizon point.
For the pyramid, y'all'll finish the drawing by connecting the three lines at the bottom. Depict a dotted horizontal line to connect the 2 angled lines, and utilise angled lines to connect each angled line to the center line.
2. How to draw cubes
Cubes can be fatigued in multiple ways, and hither, I've created two.
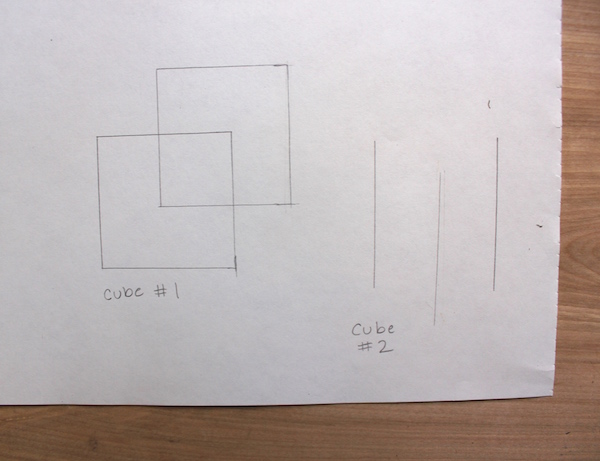
Step ane:
To first the offset cube, draw two squares that are the same size. They need to overlap, but how much is up to you.
Draw the 2d cube much similar yous did the pyramid. This time, you lot'll make three parallel vertical lines of the same size. The two outer lines should start and stop at the aforementioned point, and the middle one should be shifted down a scrap on the page.
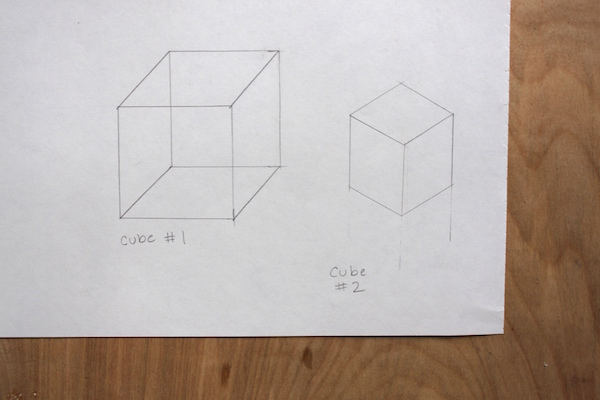
Footstep two:
Now it'southward all most connecting corners. On the first cube, use a straight edge to draw angled lines to match the respective edges. Then you'll connect the bottom right corner of the first square to the lesser correct corner of the second square. Repeat this will all four corner.
For the 2nd cube, connect the height points of the three lines with angled lines; echo with the bottom points. Draw a indicate directly in a higher place the heart line — the distance between the pinnacle of the center line and the point should exist about the length of the center line. Connect the tops of the outer two lines to the point with angled lines.
3. How to draw a cylinder
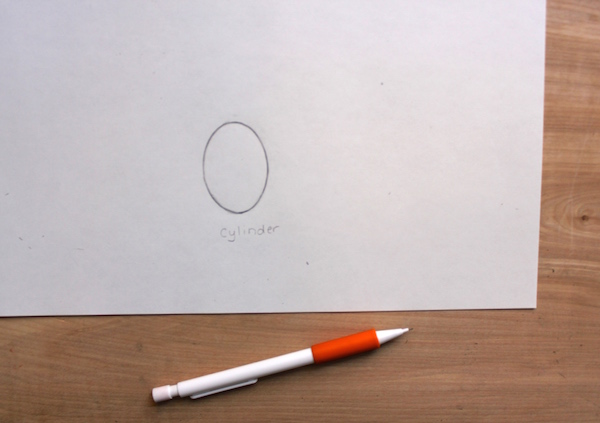
Step 1:
Start with an oval. Don't worry if you can't draw one perfectly correct abroad — I had to redo mine many times! You could trace something, besides.
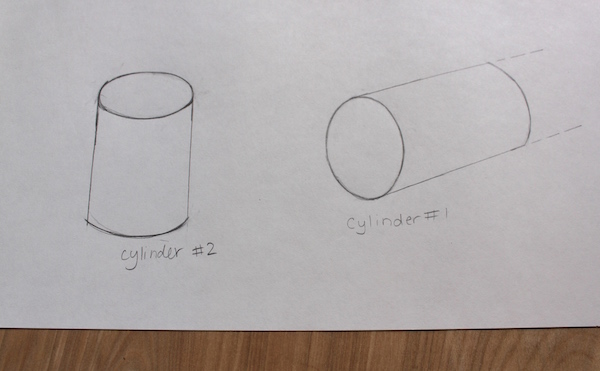
Step 2:
Afterwards you accept the oval down, describe ii directly, perpendicular lines that come up from either finish. These lines tin can be as long as y'all desire and tin go in any direction.
Footstep three:
Connect the straight lines with a curved line that mimics the roundness of the oval.
Tip: To make sure the lesser and top of your cylinder match, try turning the paper upside downwardly. It'll change your point of view and whatever inconsistencies will stand out.
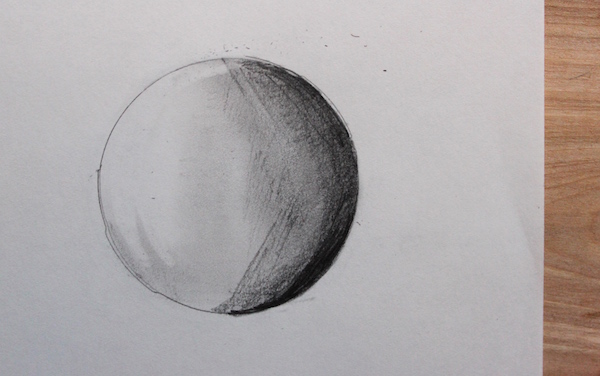
4. How to draw a sphere
There are several ways to draw a sphere, ranging from simple to very complex. No thing how much you desire to challenge yourself, a drawing of a sphere volition first with a simple circumvolve. Draw i freehand or trace a stencil or household particular.
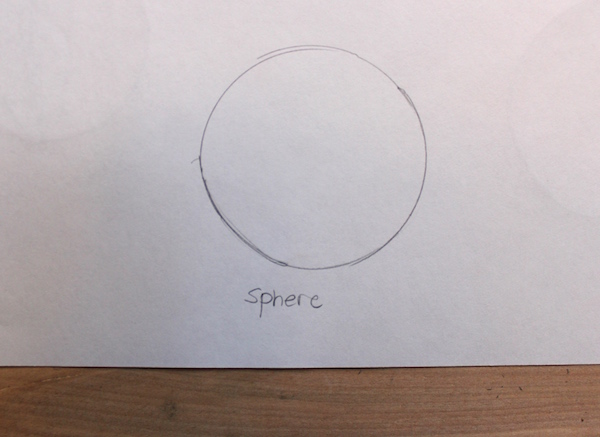
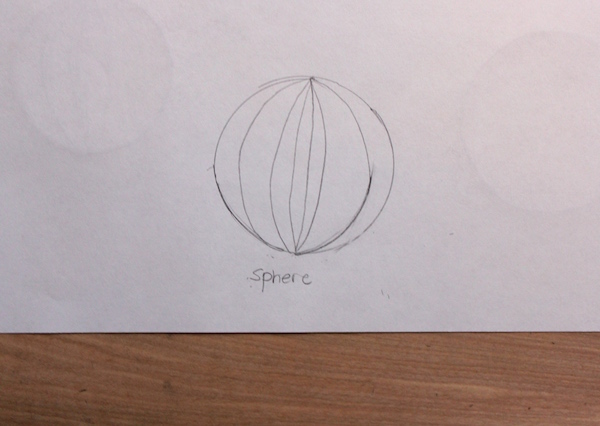
Easier:
There sphere looks best when information technology has shading, but y'all can also make information technology appear 3-D past drawing profile lines from top to bottom. Brand certain the curve mimic the curves of the circumvolve, with less exaggeration equally you lot get closer to the middle.
More advanced:
While drawing a realistic sphere is worthy of its own tutorial (this one has cracking step-by-step photos), I exercise want to requite you one quick and easy way to draw a sphere. This method looks more lifelike than the case above, just information technology's also much faster than drawing a very detailed sphere.
If y'all want to endeavor uncomplicated shading, attempt a slope from calorie-free to dark across the sphere. In this example, the light is coming from the left, so the lightest point is on the left of the sphere and the darkest is on the correct. Meet how it looks more than spherical?
5. How to draw a cone
A cone is a cantankerous between a cylinder and a pyramid. So we'll take what we know from both to depict this iii-D shape.
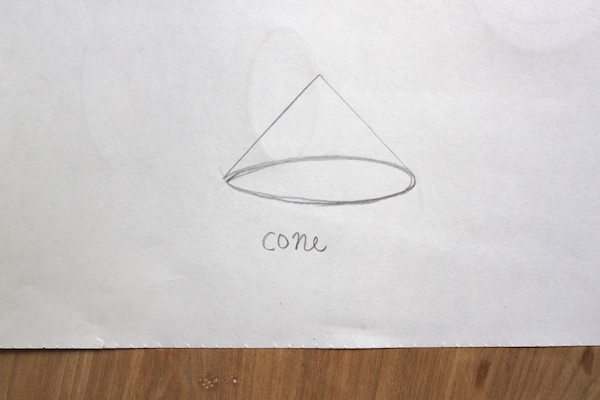
Step 1:
Get-go with a horizontal oval. It doesn't have to be perfect.
Footstep 2:
To finish, draw the two sides of a triangle. The line for each side should start at either border of the oval and meet in the middle above the center of the oval.
Tips for drawing iii-D shapes
- When trying to draw something 3-D, straight lines are important. Use a straight edge (similar a ruler) when you can. Even if yous don't have a ruler, something that'south flat and made out of a sturdy cloth will practise.
- Be aware of the angles of lines. Things similar a cube, for case, require parallel lines to give them their shape. Others, similar a cone, can accept a diverseness of angles. Compare angles by holding your pencil up to the lines. If they match, then your lines are probably parallel. If you want to get really technical, you tin employ a protractor.
- Pencils and erasers are your friend. Whenever possible, describe with pencil to get the angles and lines right.
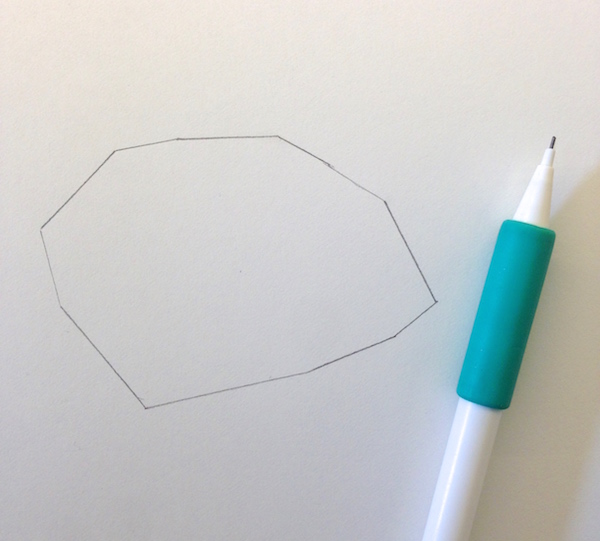
Drawing other 3-D shapes
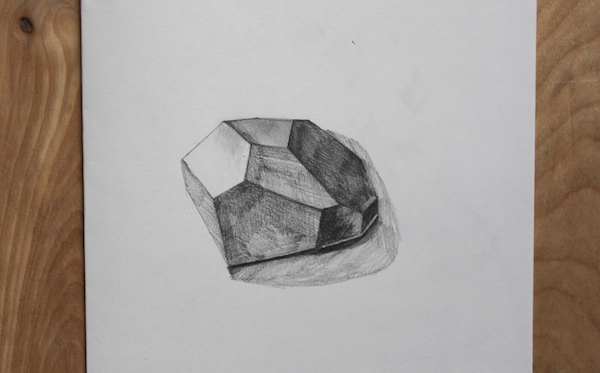
Many objects yous draw will fall into 1 of those five major shape categories. If non, remember to check your angles and brand direct lines. I have this ceramic polygon shape that doesn't actually fit every bit a cube, cone or a prism. Here'due south how I made it come to life.
Pace 1:
By starting with a straight edge, I was able to make the outline of the shape.
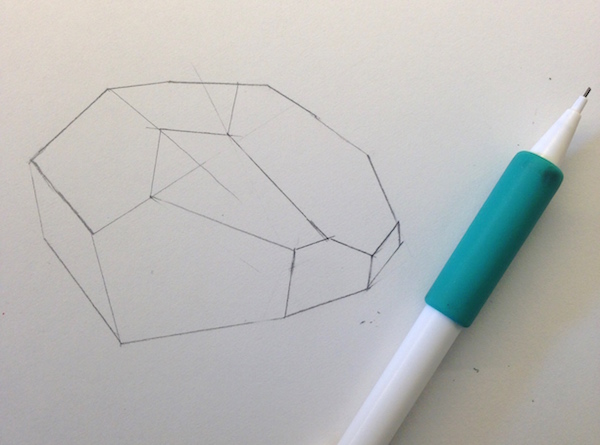
Stride 2:
I then drew the inside of the shape to convey its multi-dimensional feel. Comparison angles — from the object itself — helped me when drawing. I still had to become dorsum and fix some lines, though.
Step iii:
To requite the shape fifty-fifty more presence, I shaded parts of it based on the angle of light. This conveys the different surface planes and sense of class. Shading is a circuitous subject that nosotros don't have time to cover in this mail service, just you tin can acquire more than nigh information technology in the Craftsy form 10 Essential Techniques for Better Drawing.
Source: https://www.craftsy.com/post/how-to-draw-3d-shapes/
0 Response to "how to draw a 3d shapes step by step"
Post a Comment